Case
KwikWork leverages IBM Case Manager to enable light weight case management capability by enabling advanced case management capabilities through the KwikWork Unified View. This guide is designed to provide guidance to administrators on activating the case management features of KwikWork. The Case Management functionality can be configured in the 'Case Management' section of the KwikWork Configuration Panel of the desktop that is being configured.
Step 1 Configure 'Case' Functionality
- Open the KwikWork Configuration Panel for the desktop that is being configured from the layout tab of the 'Administration View' of the desktop by clicking 'KwikWork UX' from the Features. Click the 'Config Panel' then select the Case tab.
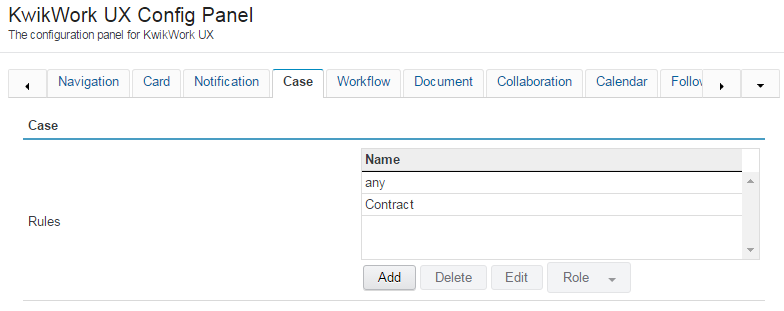
- Select an existing rule and click 'Edit' or click the 'New' button to create a new case rule. A rule should be created for each case type that will be accessed through KwikWork.
- Select the name of the case type form the 'Name' drop down. Use 'any' for default configuration.
- Select the entry template for the case type selected above. This will be used to display metadata in the 'Main' tab when cases are opened.
- The 'Show Folder Content' option allows users to browse all documents and sub folders within a case. Check or Uncheck the 'Show Folder Content' box to control this feature.

- KwikWork allows users to automatically search for documents that are related to a case. These are configured in the 'Related Content Searches' grid by adding the search templates that are related to the case from the choice lists in the property field. After clicking the 'Add' button, select the search template from the list of available search templates.

- The 'Case Content Searches' allows users to view various documents that are filed in a case. KwikWork uses a search template of the document types that need to be viewed and filters the search results to display only documents in the opened case folder.

- Use the check box to enable or disable the 'Contact' tab when cases are opened. The 'Contacts' tab displays any contacts that have been associated to the case.
- KwikWork requires a Contacts search template which performs searches on the Contacts class in order to associate contacts to case, email or event which must be created in IBM Content Navigator and must contain an ID search property with a parameter of Includes Any.
- In order for KwikWork to be able to add new contacts, the administrator needs to create an entry template using IBM Content Navigator or WorkplaceXT. Refer to the IBM documentation for details on creating these templates then proceed to the next step.
- The Contact Association search template created above should be selected from the 'Contact Search' choice list. Optionally, you can also use the same search for the Case Contact Search which allows users to be able to only view contacts that are file within a case for emails and creation of calendar events and tasks.
- Select the Contacts entry template that was created in step 10 above from the 'Contact Entry Template' choice list.

- The Contact Search and Entry Templates are required for KwikWork Calendaring functionality. In order to use calendaring for documents, these setting must be configured in an 'any' case rule.
Configure 'External Pages' Functionality
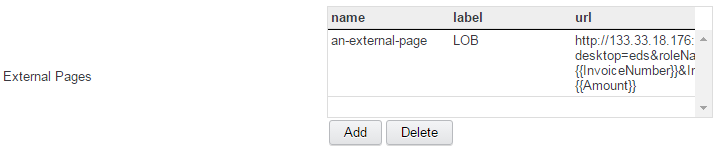
The KwiKWork 'External Pages' functionality provides the ability to access a Line of Business application by injecting properties of a case into a URL which is displayed in a tab when the case is opened. To use this functionality, a URL is constructed with the symbolic name of the properties to be injected enclosed in double curly brackets. An example is shown below.
http://<URL to access System>&searchId={{InvoiceNumber}}&InvoiceNumber={{Amount}}The 'External Pages' functionality is configured as follows:
- Click the 'Add' button to create a new row in the grid.
- Double click the 'Name' field and enter a name for the external page being configured
- Double click the 'label' field and enter the text that will be visible to the end user as the heading of the tab when a case is opened.
- Double click the 'url' field and enter a url following the convention specified above.
Configure Case Header Properties
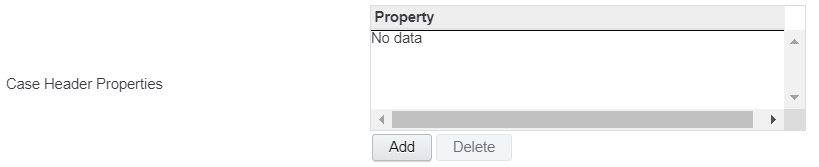
KwikWork has the ability to display some case properties as a header when a case or case task is opened in the Case Tabbed View. In order to use this functionality, the administrator simply has to select the the properties that will be displayed when a user opens corresponding documents.
- Open the KwikWork Configuration Panel for the desktop that is being configured from the layout tab of the 'Administration View' of the desktop by clicking 'KwikWork UX' from the Features list then scroll down to the Case section.
- Select the rule for the case class to be configured then click 'Edit' or add a new rule.
- Click the add button in the 'Case Header Properties' then double click the entry to select the property that will be displayed.
Configure 'External Widgets' Functionality
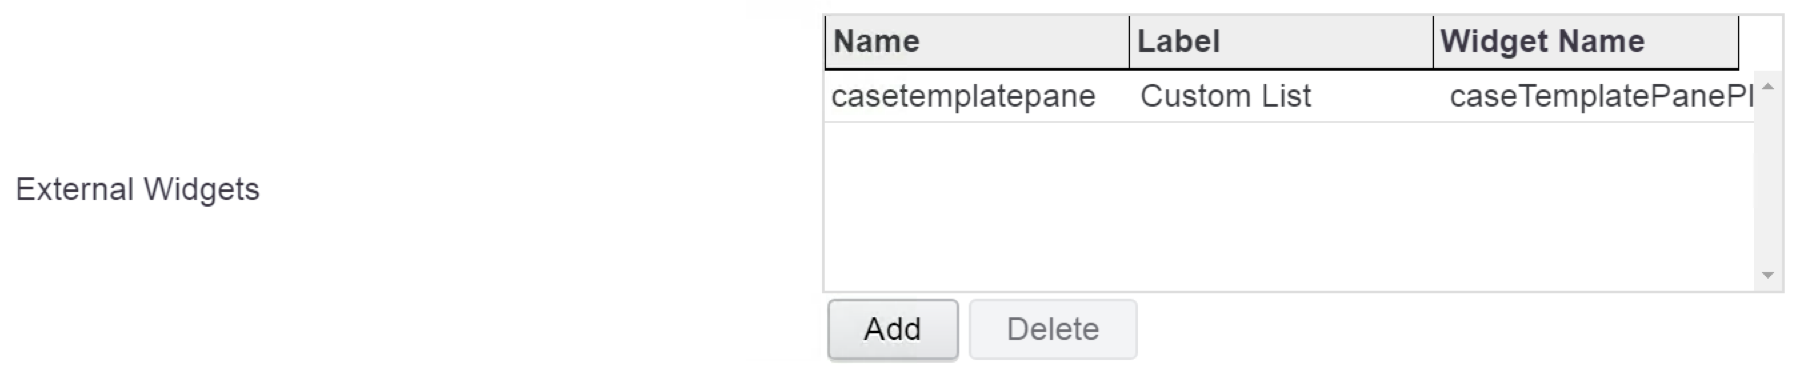
The KwiKWork 'External Widgets' functionality provides the ability to access ICN Plugins/Widgets from within the Case Tabbed View.
The 'External Widgets' functionality is configured as follows:
- Click the 'Add' button to create a new row in the grid.
- Double click the 'Name' field and enter a name for the external page being configured
- Double click the 'Label' field and enter the text that will be visible to the end user as the heading of the tab when a case is opened.
- Double click the 'Widget Name' field and enter the the module identifier or Module ID of Widget that is being added. For example 'dojox/encoding/crypto/Blowfish' where "Blowfish" represents the name of the Widget and the content before the last forward slash represents the name of the module in which the widget is packaged.
Special Note
KwikWork can display a maximum of 20 addition tabs including searches, widgets and links.
Use ICM Reassign Dialog
This feature allow users to be able to reassign case tasks using the out of the box IBM Case Manager dialog. To enable this feature, simply check the check box

Create Case Tasks
KwikWork has the ability to allow users to create discretionary tasks from within the Task tab within a Case Tab View using a one click action. To enable this feature, simply check the check box which will activate an 'Add' button to the Task tab.

Resources
- IBM FileNet P8 documentation can be located at http://www-01.ibm.com/support/knowledgecenter/SSNW2F_5.2.1/com.ibm.p8toc.doc/welcome_p8.htm
- IBM Content Navigator Documentation can be located at http://www-01.ibm.com/support/knowledgecenter/SSEUEX_2.0.3/contentnavigator_2.0.3.htm
- For KwikWork icons configuration, review the KwikWork Icon documentation located at Icons