Installing KwikWork
The following steps are required to install KwikWork for Content Navigator.
Expand the installer
The installer needs to be expanded on the Content Navigator server by following the steps below:
unzip KwcnSetup-3.8.zipCreate Shared Libraries
- Copy the kwcn-client.jar file from the installer to the 'ECMClient/plugins' directory
- Create a directory called RepositoryAPI in the the IBM directory. Copy the files 'Jace.jar' and 'Pe.jar' from the 'navigator.ear\navigator.war\WEB-INF\lib' directory to the RepositoryAPI directory.
- Log into the WebSphere Integrated Solutions Console on the application server where IBM Content Navigator is installed then navigate to Environment → Shared libraries.
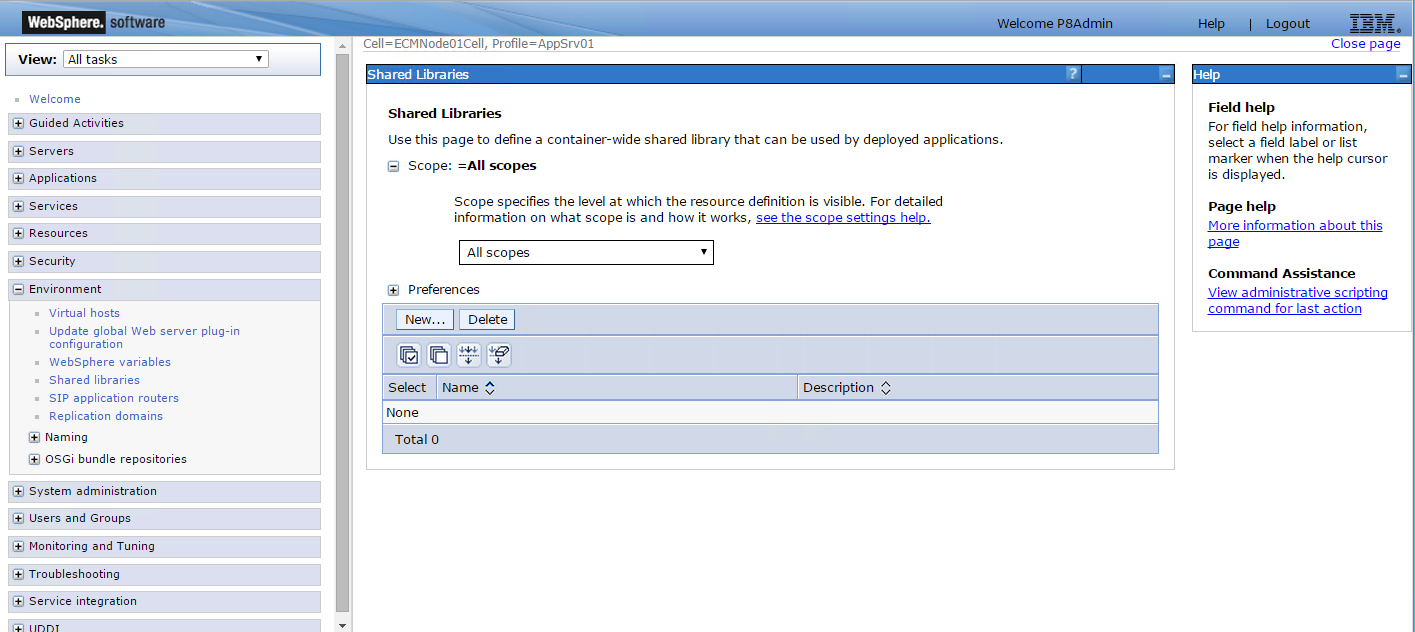
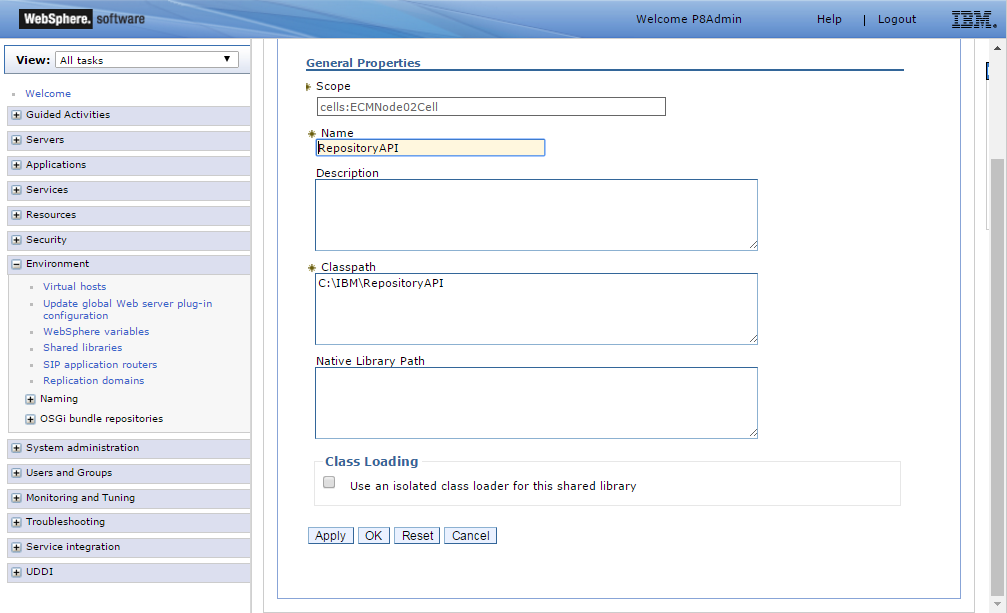
Click 'New' to create a new shared library called KwcnClient. In the 'Classpath' field enter the path of the kwcn-client jar file located in the Plugins directory then click the 'OK' button and save directly to the master configuration.
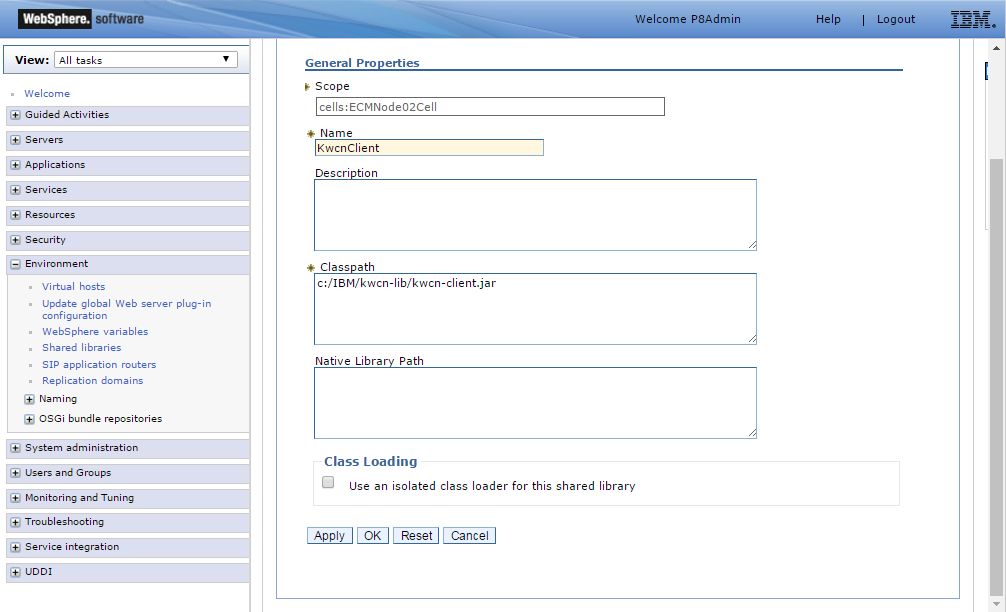
Click 'New' to create a new shared library RepositoryAPI (this name is mandatory for KwikWork to function correctly). In the 'Classpath' field enter the path of the RepositoryAPI directory in the IBM directory then click the 'OK' button and save directly to the master configuration.
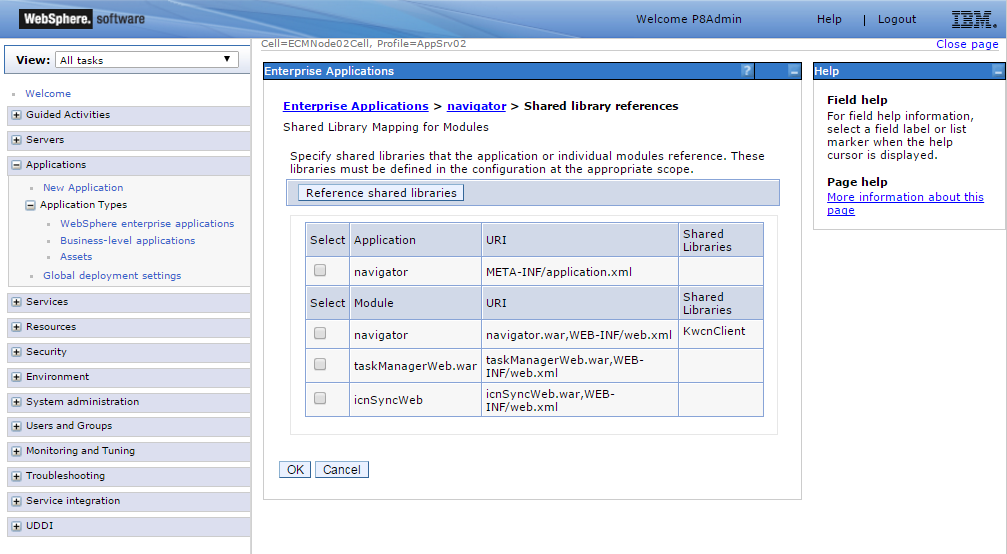
In the WebSphere enterprise applications section, edit the navigator application. Add a new shared library reference for the navigator web module and point it to the KwcnClient shared library that was created then click 'OK' and save to the master configuration.
Install the KwikWork Engine in IBM WebSphere
The KwikWork engine can be installed in WebSphere by following the steps below.
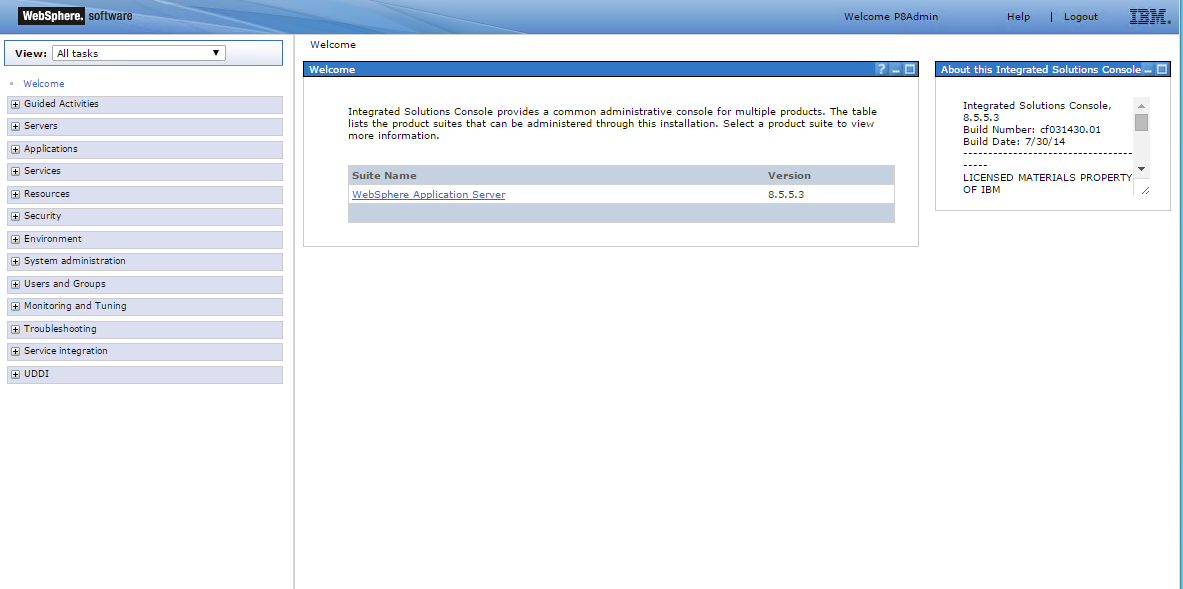
- Log into the WebSphere Integrated Solutions Console on the application server where IBM Content Navigator is installed.
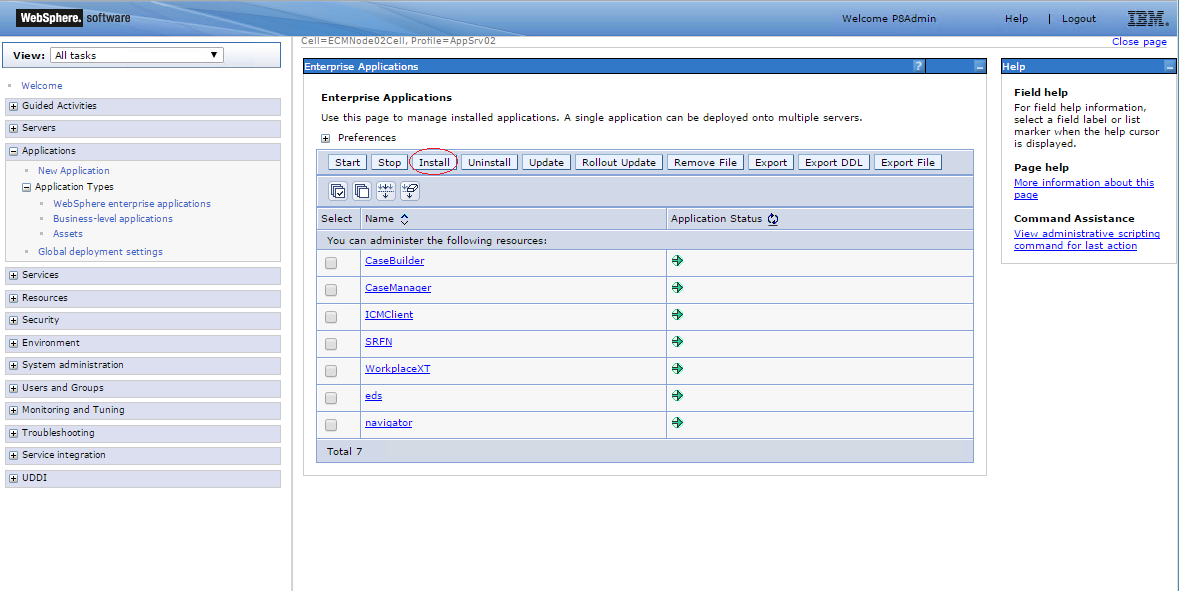
- Navigate to Applications → Application Types → WebSphere enterprise applications using the vertical navigation tree on the left then click the install button above the list of installed applications.
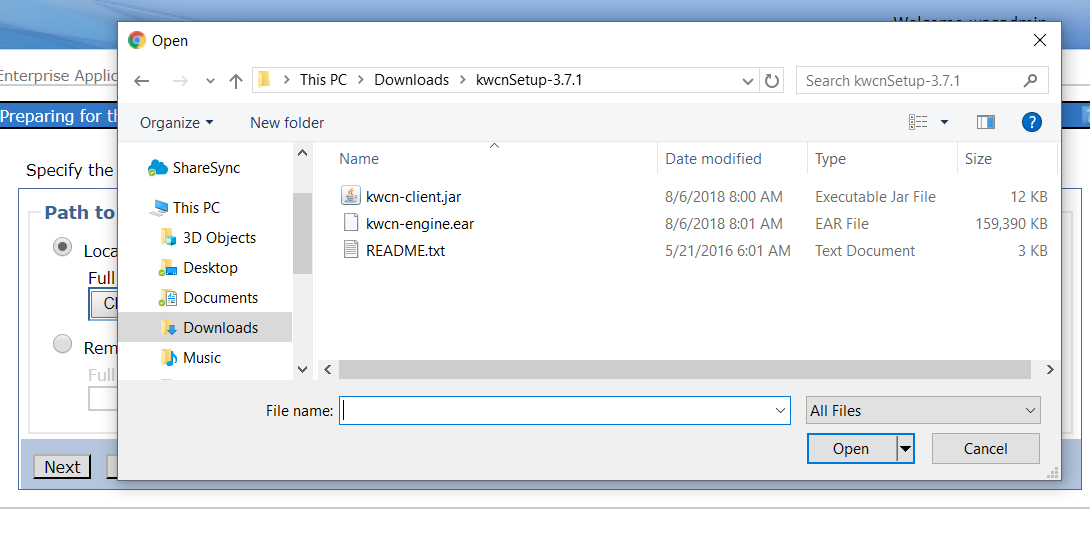
- Click the 'Choose File' button under 'Path to the new application' and locate the kwcn-engine.ear file in the installer that was extracted earlier. Select the ear file, click 'Open' on the dialogue box then click Next.
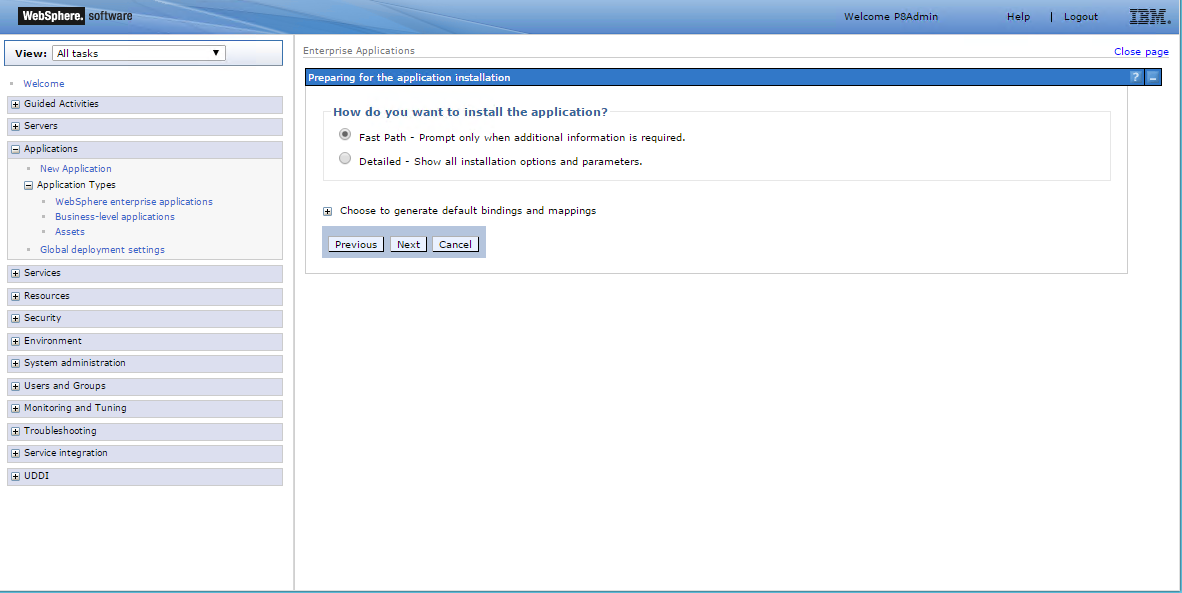
Choose 'Fast Path' if it is not already selected then click Next.
Leave the default values for all steps of the install process.
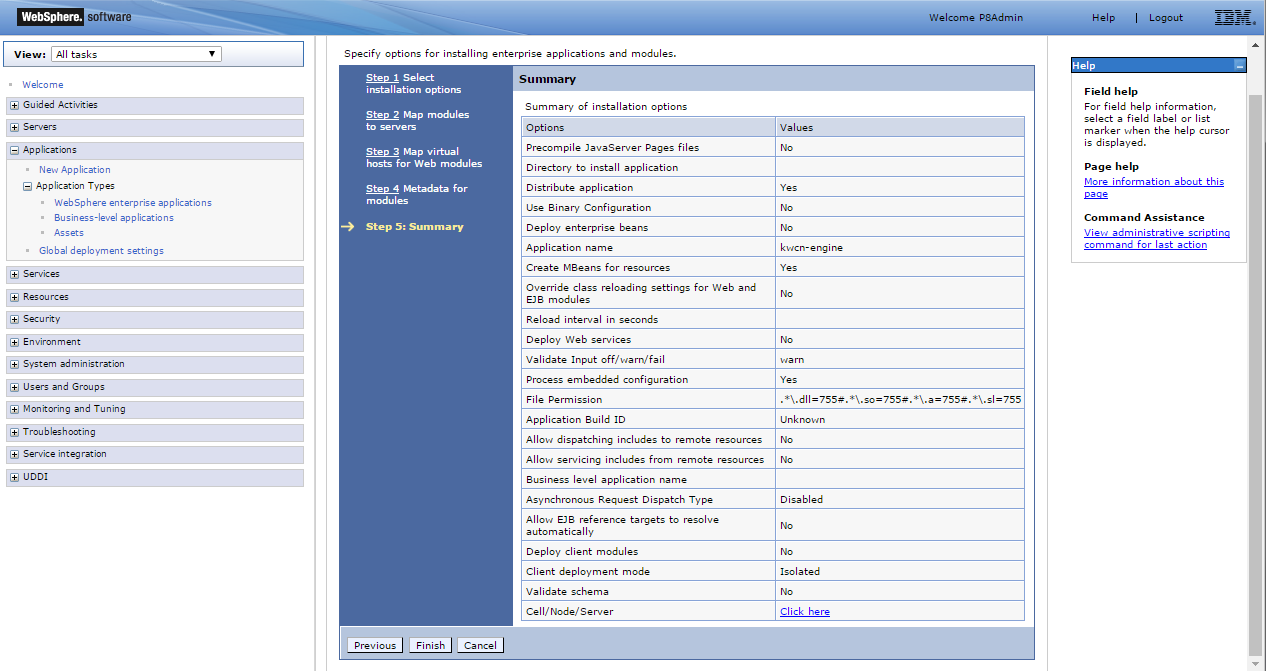
Finally verify the settings on the Summary page and click 'Finish' for WebSphere to install the Kwcn Engine then save to master configuration.
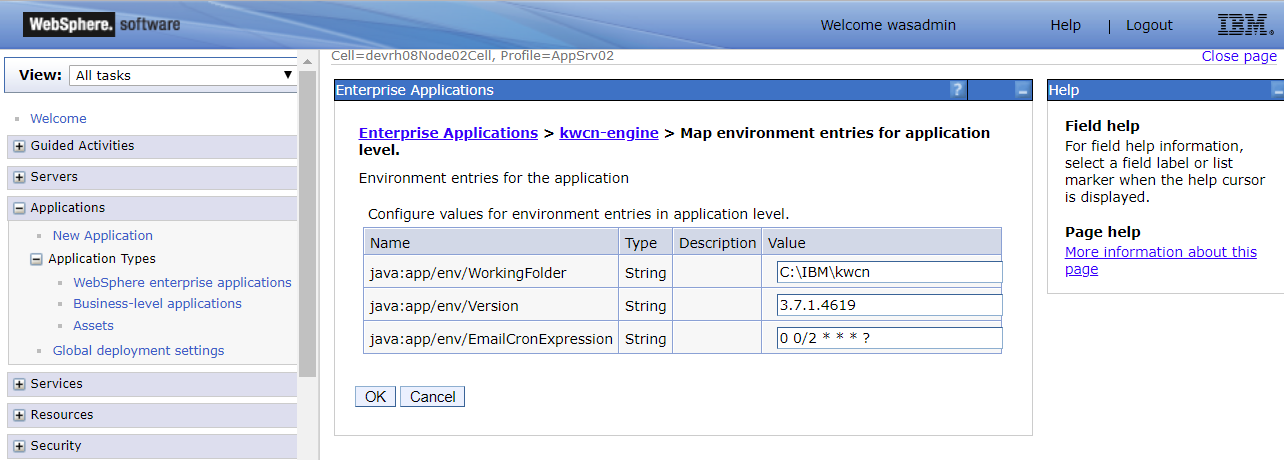
Edit the newly installed kwcn-engine and click 'Environment entries for the application' then update the WorkingFolder to point to the location on the server where KwikWork configurations will be stored. Click 'Ok' and save to master configuration.
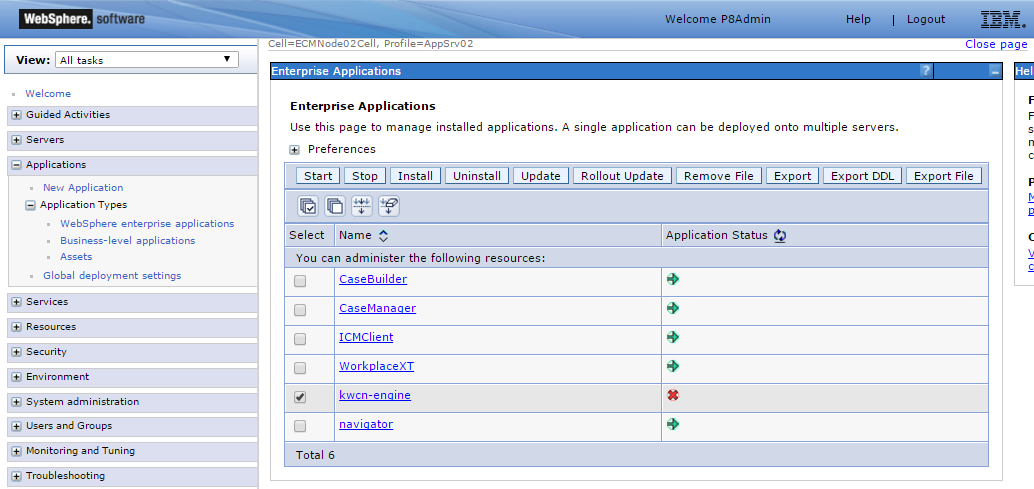
Finally, start the KwikWork Engine by checking the box for kwcn-engine then clicking Start.
Add KwikWork UX License
- Navigate to the KwikWork working folder on the server.
- From the working folder, navigate to the 'import/license' folder then copy the KwikWork UX license key provided by enChoice to the license folder.
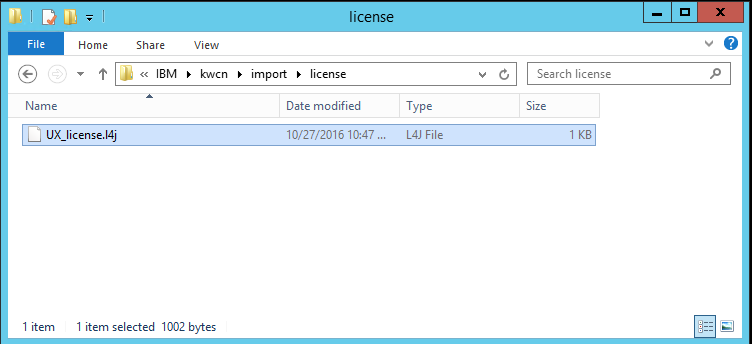
- After a few second the license file should disappear from within the /kwcn/import/license' folder. Once this has occurred, verify that it has been copied to the 'kwcn/import/success' folder.
- Finally, restart the kwcn-engine application from the WebSphere console.
Add KwikWork for Content Navigator to IBM Content Navigator
1. Log-in to the Content Navigator admin desktop.
Example: http://server1:9080/navigator
2. Load the KwikWork for Content Navigator plug-in
Click on Plug-ins from the left navigation bar
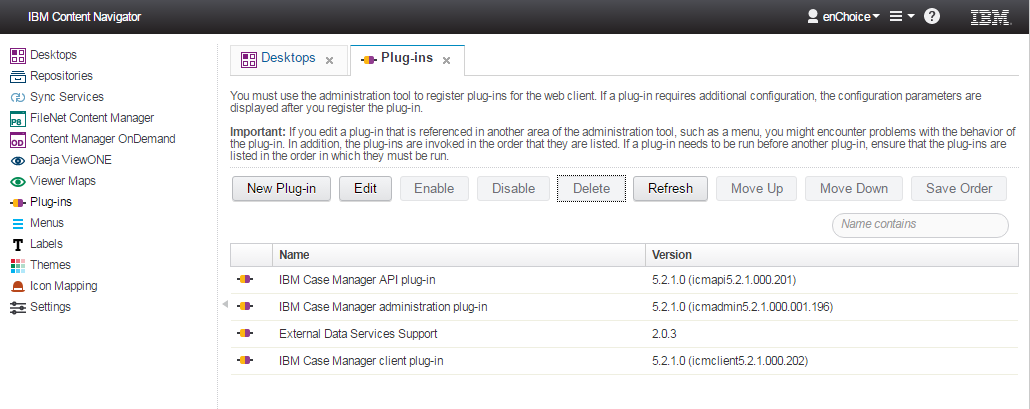
- Click on new plug-in
- The KwikWork plug-in jar file in now part of the kwcn-engine application and the path should be http://localhost:9081/kwcn-web/kwcn-plugin.jar (substitute 9081 for the port of the WebSphere application server where Navigator and the Kwcn Engine are installed). Once the path is entered click on "Load"
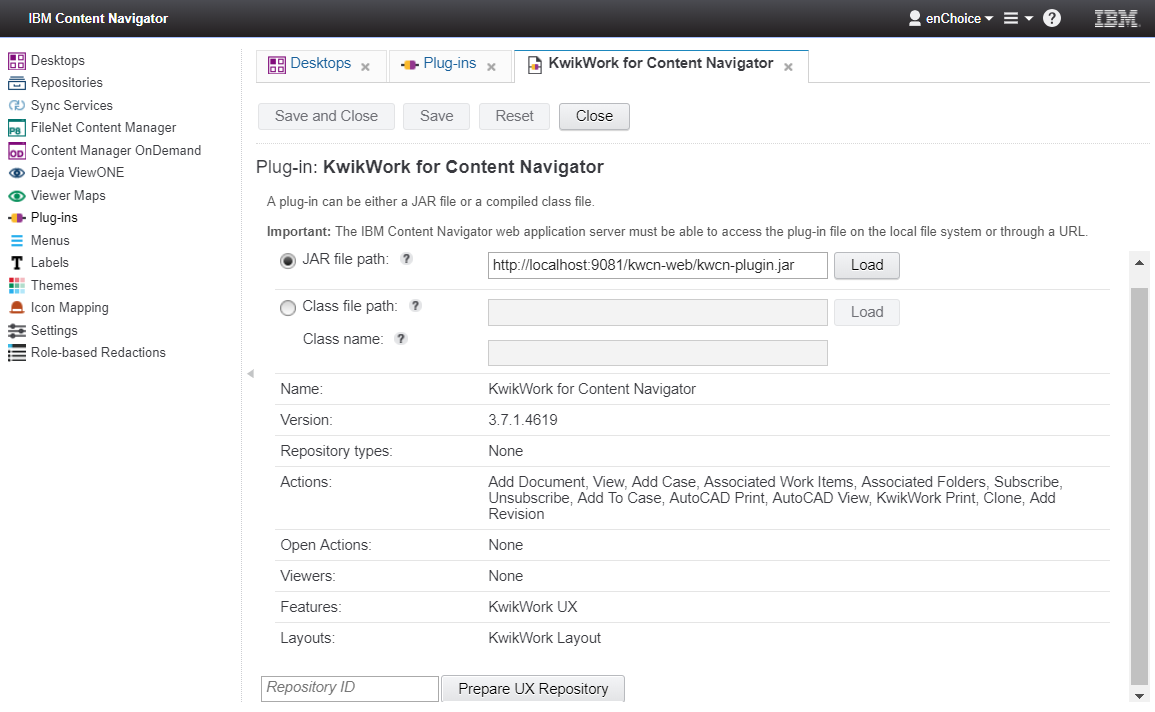
- After the plug-in loads click on save and then close.
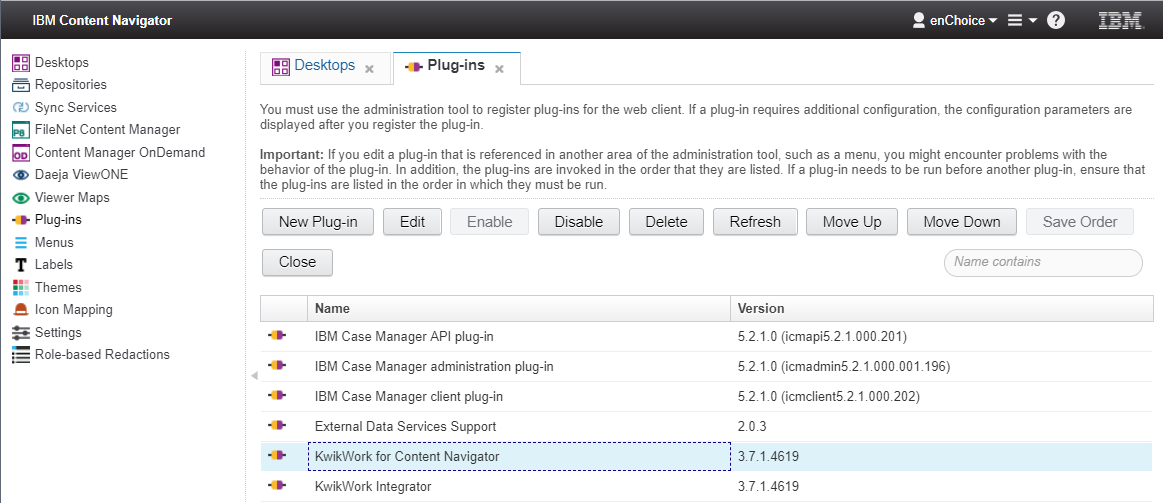
3. Add the KwikWork feature(s) to the appropriate desktop(s):
KwikWork can be configured for each IBM Content Navigator desktop after the plug-in is loaded using the following steps:
- Open the Content Navigator Administration panel. By default, this should open the desktops configuration panel.
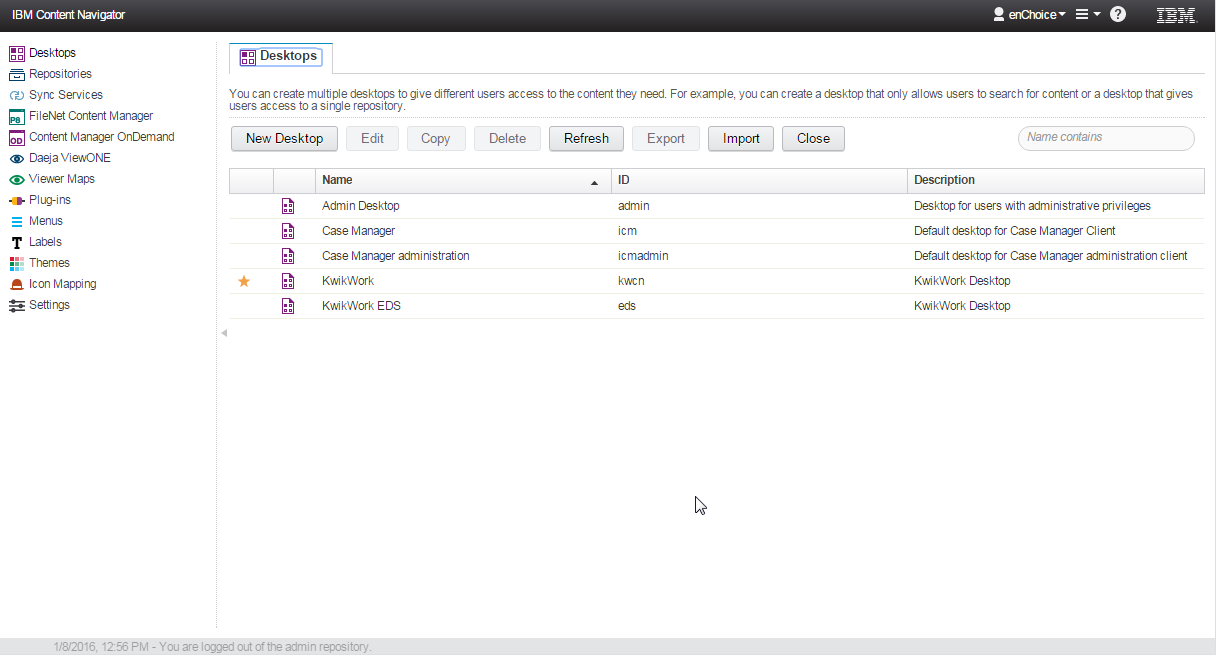
- Click on the desired desktop and click edit from the top menu.
- Open the Layout tab by clicking on layout.
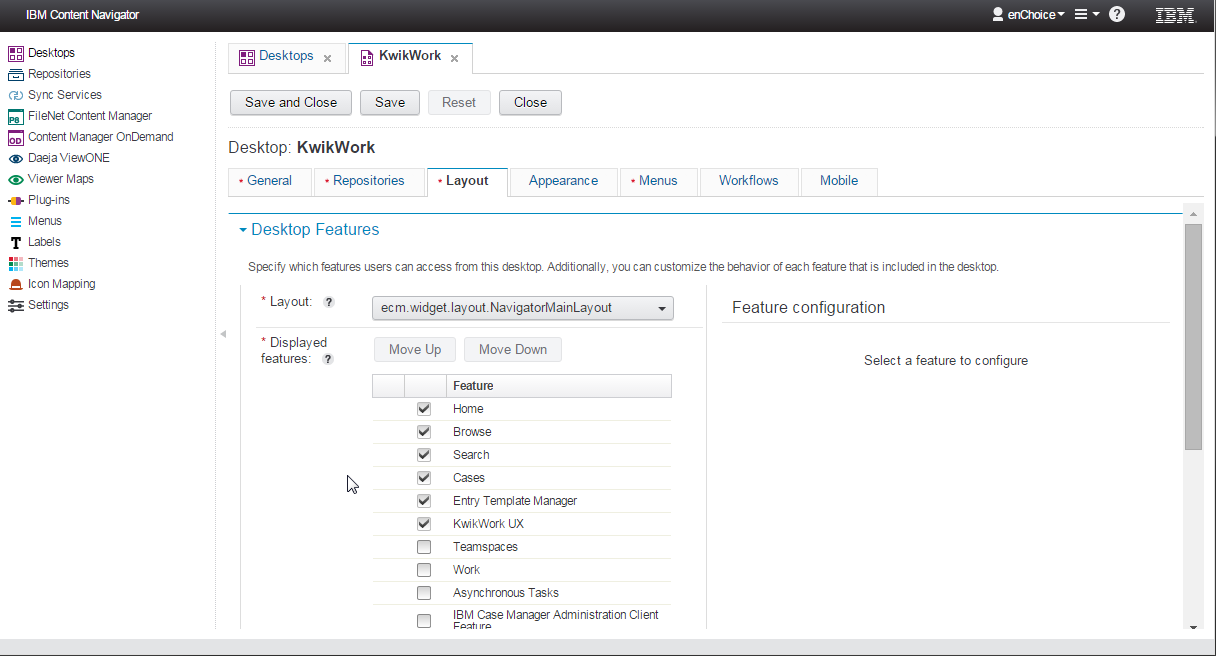
- Check the box to select the KwikWork UX feature.
- Select KwikWork UX as the default feature from the drop-down.
- Click "Save" or "Save and Close" to complete the configuration.
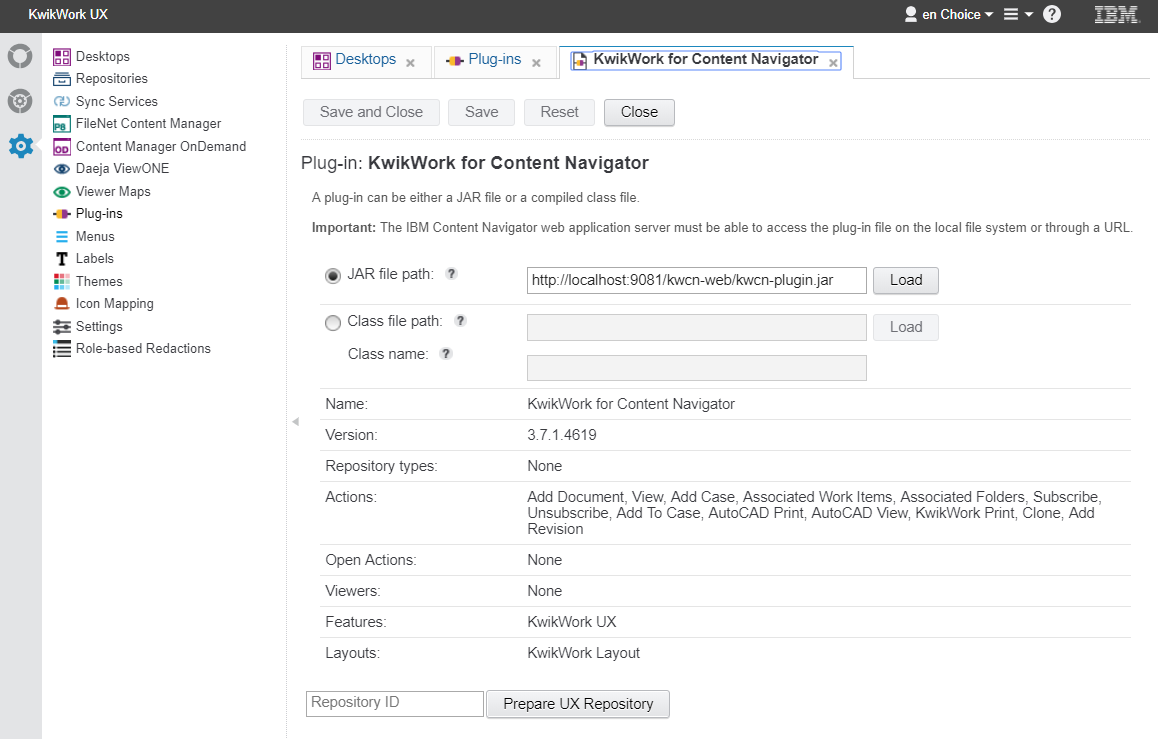
- Navigate to the desktop where the KwikWork features were added then edit the KwikWork for Content Navigator plugin in the Administration View.
- In the field at the bottom of the settings, enter the ID of the primary repository of the desktop then click the 'Prepare UX Repository' button.
- Open the Content Navigator Administration panel. By default, this should open the desktops configuration panel.
4. Final Steps
- Create Search and Entry templates for the Contacts document class created when Prepare UX Repository is executed.
- After the Prepare UX Repository set is completed, KwikWork creates a number of objects that users need to have permissions. These are as follows:
| Object | Permissions | Description |
|---|---|---|
| Email Correspondence Document Class | Create | Used when emails are sent from within the KwikWork Unified View or Tab View |
| Email Folder | Class | Used to store new unfiled emails that are sent to KwikWork without a case identifier in the subject |
| Kw Rendition Document Class | Create and Delete | Used when documents are printed using the KwikWork Print or AutoCAD print and when DWG files are rendered in the Unified View |
| Upload Document Class | Modify Permissions | Used when documents are added using the Upload Manager |
| User Folder Class | Create | When users update their KwikWork Preferences, a user folder is created |
| kwcn/user-folder | Create sub-folder, File and Un-file | Used to store un-filed emails |