Document
Configure 'Unified View Rules' Functionality
The KwikWork Unified View Rules functionality adds enhanced tab functionality when a document is opened in the unified view, allowing users to view related documents as well as access content from an external system . In order to use this functionality, a rule must be configured as follows:
- Open the KwikWork Configuration Panel for the desktop that is being configured from the layout tab of the 'Administration View' of the desktop by clicking 'KwikWork UX' from the Features. Click the 'Config Panel' then select the Document tab.
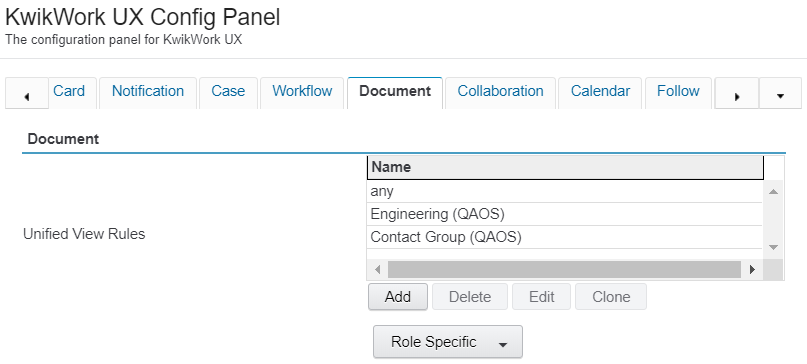
- Click 'Add' in the 'Unified View Rules' section to create a new rule then select the 'Name' of the document class that the rule is being configured for. For a general rule that applies to any classes without a specific configuration, choose 'any' as the name of the rule.
- In the 'Related Content Searches' section, click 'Add' then double click 'New' and select a search template from the drop down.
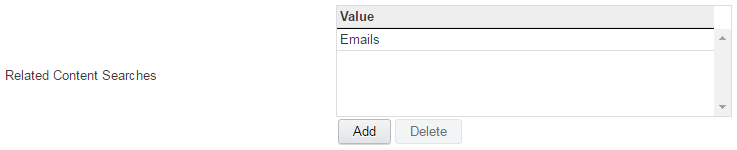
- In the value field, enter the symbolic name of the document class for which the related search should be displayed then click 'Save'
Configure Document Header Properties
KwikWork has the ability to display some document properties as a header above the document in the Unified View. In order to use this functionality, the administrator simply has to select the the properties that will be displayed when a user opens corresponding documents.
- Open the KwikWork Configuration Panel for the desktop that is being configured from the layout tab of the 'Administration View' of the desktop by clicking 'KwikWork UX' from the Features list then scroll down to the Document section.
- Select the rule for the document class to be configured then click 'Edit' or add a new rule.
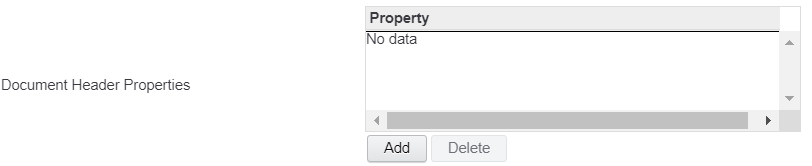
- Click the add button in the 'Document Header Properties' then double click the entry to select the property that will be displayed.
Configure 'External Pages' Functionality
The KwiKWork 'External Pages' functionality provides the ability to access a Line of Business application by injecting properties of a document into a URL which is displayed in a tab when the document is opened. To use this functionality, a URL is constructed with the symbolic name of the propertes to be injected enclosed in double curly brackets. An example is shown below.
http://<URL to access System>&searchId={{InvoiceNumber}}&InvoiceNumber={{Amount}} |
The 'External Pages' functionality is configured as follows:
- Click the 'Add' button to create a new row in the grid.
- Double click the 'Name' field and enter a name for the external page being configured
- Double click the 'label' field and enter the text that will be visible to the end user as the heading of the tab when a document is opened.
- Double click the 'url' field and enter a url following the convention specified above.

Configure Association Rules
Case Association
The KwikWork Case Association functionality enables users to file existing document into a case. It utilizes a search template to find case folders in which documents need to be filed. KwikWork is packaged with a default 'Case Association' search template which searches for all folders in the repository that is activated by default when KwikWork is installed. Administrators are however able to configure KwikWork to only use specific case types for a document type or use a specific case for all documents within the repository. The following steps are a guide on how to configure the case association functionality using a non-default search template.
- Open the KwikWork Configuration Panel for the desktop that is being configured from the layout tab of the 'Administration View' of the desktop by clicking 'KwikWork UX' from the Features list then scroll down to the Document section.
- Select an existing 'Association Rule' of the document class to be configured then click 'Edit' or click 'New' to be created a new rule.
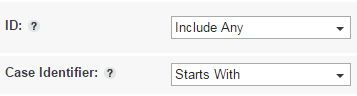
- Select a search template from the 'Associated Cases Search' drop down. The search template must be configured with an 'ID' property with an 'Includes Any' operator as well as a 'Case Identifier' property with a 'Starts With' operator as shown below.

- Finally click the 'Save' button to save the new 'Associated Case Searches' configuration.
Configure Work Item Association
The KwikWork Work Item Association functionality allows users to view and access any work items that a document is part of. This feature is configured in the Associated Work Items section of the Document tab by entering the 'rosterName' and 'attachmentName' of the workflow.

Configure Document Association
The KwikWork Document Association functionality enables users to associate child documents to compound documents. Once enabled, in conjunction with the KwikWork desktop client, when a user clicks on the parent document, both the parent and any associated child documents are automatically downloaded. It utilizes a search template which is used to associate existing documents as children and an entry template which allows child documents to be added. Like with case association, administrators should create a search template that contains an 'ID' property with an 'Includes Any' operator. The following steps are a guide on how to configure the document association functionality using a non-default search template.
- Open the KwikWork Configuration Panel for the desktop that is being configured from the layout tab of the 'Administration View' of the desktop by clicking 'KwikWork UX' from the Features list then open the document tab.
- Select the rule for the document class to be configured then click 'Edit' or click 'Add' to create a new rule.
- Select a search template from the 'Associated Document Search Template' drop down. The search template must be configured with an 'ID' property with an 'Includes Any' operator.
- Select the document entry template that will be used to add new child documents.
- Check the 'Show Compound Association' box.

Configuring Entry Template Rules
Folder Association
When documents are being indexed using the KwikWork Upload managers, users are able to select the folder(s) where those documents will be filed. This feature can be configured at the level of the entry template by the administrator by configuring document entry template rules. Any document entry template for which a rule is not created, documents will be saved in the location that was specified when the entry template was created. The following steps are a brief guide of the process of creating document entry template rules.
- Open the KwikWork Configuration Panel for the desktop that is being configured from the layout tab of the 'Administration View' of the desktop by clicking 'KwikWork UX' from the Features list then open the document tab.
- In the Entry Template Rules section click the add button to create a new rule. If there is an existing rule, there is the option to edit the rule.

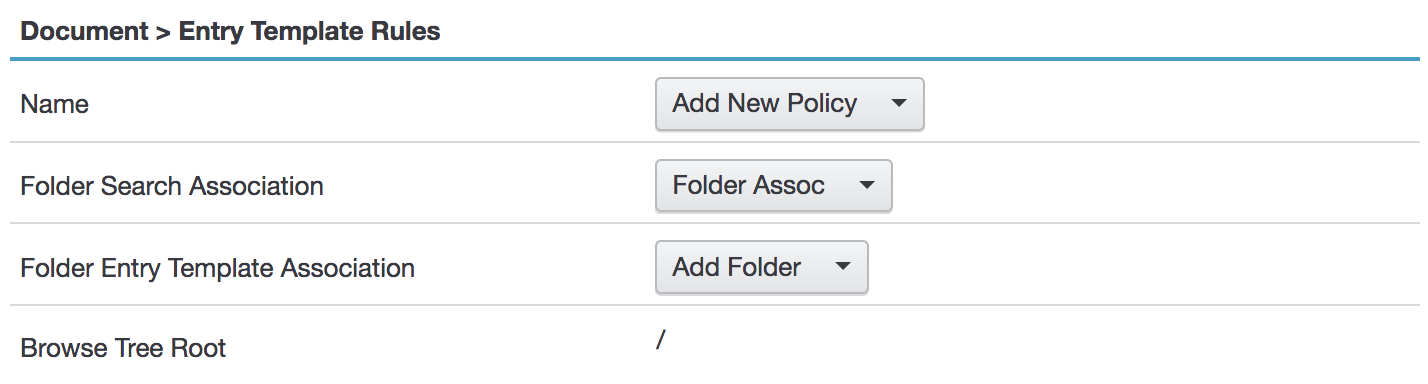
- From the Name drop down, select the document entry template for when the the rule is being configured.
- Select a search template from the 'Folder Search Association' drop down. This search template must be a folder search template that is configured with an 'ID' property with an 'Includes Any' operator similar to those of the case and document association.
- Optionally, select a folder entry template from the 'Folder Entry Template Association' drop down to allow users to create ad hoc folders when documents are being indexed.
- KwikWork also allows users to browse a folder tree in order to specify the folder in which documents will be save by optionally specify a path for the 'Browse Tree Root'. The location specified would represent the highest level of the tree.
- Finally Click the save button to save the new rule that was created or proceed to the context rules section.
Context Rules
The KwikWork upload manager automatically populates properties in context based on cases, documents or work items that are opened by detecting properties that are common between the opened item and the entry template being used for upload. In order to improve the efficiency of the upload process, properties also remain sticky when uploading multiple documents negating the need to re-enter common properties and change properties as needed. KwikWork Context Rules extends this feature by allowing administrators granular controls over which fields that should be populated in context and remain sticky in addition to making some properties read-only after the first document has been saved. The following is a brief guide on configuring context rules.
- Open the KwikWork Configuration Panel for the desktop that is being configured from the layout tab of the 'Administration View' of the desktop by clicking 'KwikWork UX' from the Features list then open the document tab.
- In the Entry Template Rules section click the add button to create a new rule and select an entry template. If there is an existing rule, there is the option to edit the rule.
- In the 'Context Rules' section choose the properties in the entry template for which KwikWork will recognize context by enabling 'Use Context'. These are the properties that KwikWork will automatically populate and remain sticky during indexing. Any fields properties that need to be specified for every document that is uploaded should be set to false.
- Optionally set 'Readonly' to true for any properties that should not be changed if a value exists in the open item in context or after the first document has been added. Note: If a value exists for the property in context (open item) then the property is automatically set by the KwikWork UX and ready only. In the case of an empty property, the field is editable by the user for the first document being indexed and read only for subsequent document being indexed. This configuration can only be used in 'Use Context' is enabled.

- Finally 'Save' the rule and KwikWork Configuration Panel.
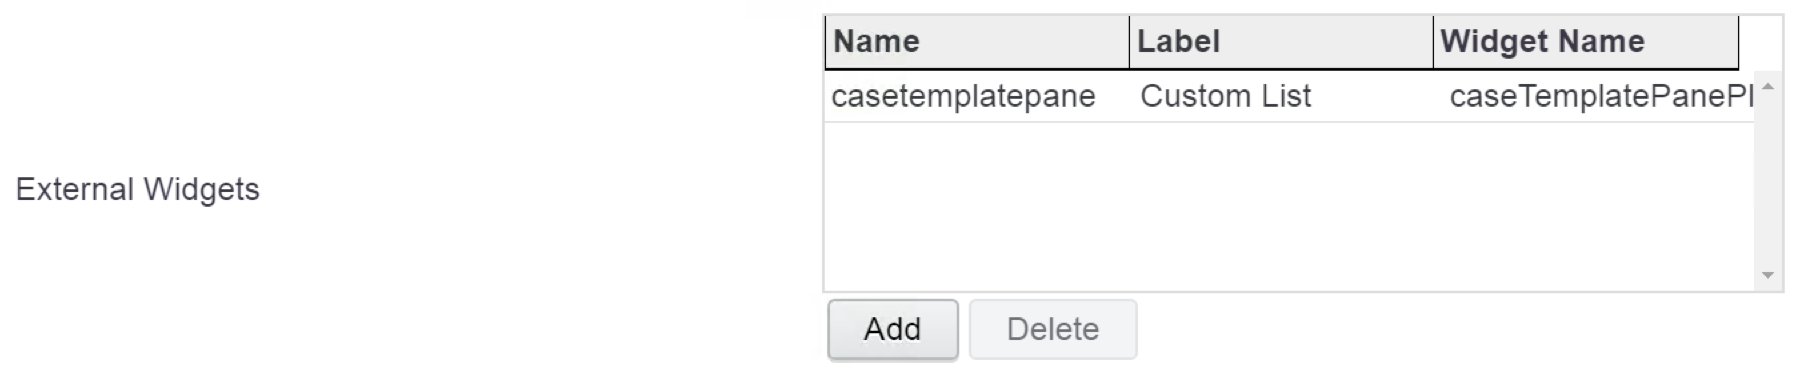
- Double click the 'Widget Name' field and enter the the module identifier or Module ID of Widget that is being added. For example 'dojox/encoding/crypto/Blowfish' where "Blowfish" represents the name of the Widget and the content before the last forward slash represents the name of the module in which the widget is packaged.
Special Note
KwikWork can display a maximum of 20 addition tabs including searches, widgets and links.
Configuring Add Revision Rules
KwikWork has the ability to increment a property when new versions of a document is added to the repository. In order for this feature to be available to users of the KwikWork UX, the 'Add Revision" feature must be added to the 'Document context menu' and 'Content List Toolbar' menus for the desktop. This feature can be configured as follows.
- Open the KwikWork Configuration Panel for the desktop that is being configured from the layout tab of the 'Administration View' of the desktop by clicking 'KwikWork UX' from the Features list then open the document tab.
- Click the 'Add' button to create a new revision rule.
- Select the name document class for when the rule is being created.
- Select whether the checkout should be cancelled for the original document as well as any children if configured.
- Choose whether or not the original document should be checked out in order for a new revision to be added.

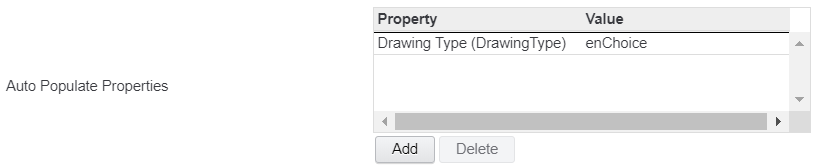
- Click the 'Add' button in the 'Auto Populate Properties' then select any properties that should be auto populated with a specified value.
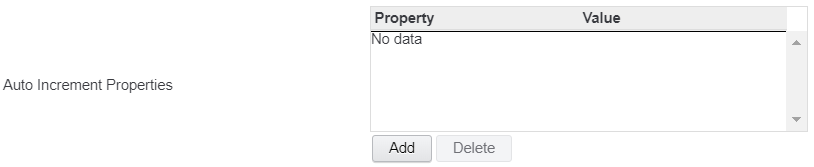
- Click the 'Add' button in the 'Auto Increment Properties' then select any properties that should be auto incremented and how much it should be incremented.
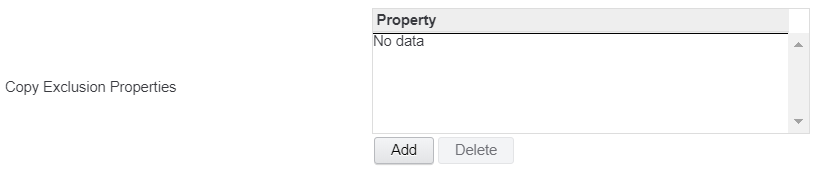
- Click the 'Add' button in the 'Copy Exclude Properties' then select any properties that should not be copied from the original document.
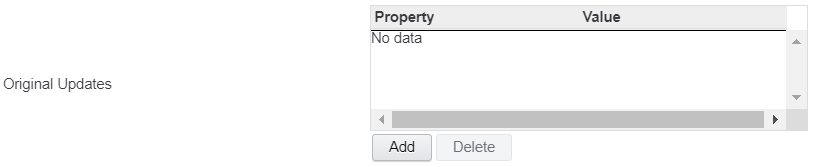
- Click the 'Add' button in the 'Original Updates' then select any properties that should be updated on the original document.
Configure Upload Manager Indexing Behavior
When documents are uploaded using the KwikWork Upload Manager, they are stored in a temporary 'KwUpload' class before being stored in the document class of the chosen Entry Template after indexing. Administrators have the option of choosing whether a new document is created when a document is indexed in the upload manager or if a reclassify event is performed in which no new document is created. This feature is controlled by setting the 'Create New When Indexing Uploaded Document' check box.

Configure Associated Content Rules
The KwikWork Associated Content functionality enables administrator to provide users with the ability to view associated documents from within the KwikWork collaboration panel. It utilizes a search template to find documents that have common properties as the opened document. The following steps are a guide on how to configure the case association functionality using a non-default search template.
- Open the KwikWork Configuration Panel for the desktop that is being configured from the layout tab of the 'Administration View' of the desktop by clicking 'KwikWork UX' from the Features list then scroll down to the Document section.
- Select an existing 'Association Rule' of the document class to be configured then click 'Edit' or click 'New' to be created a new rule.
- Select the document class for which the rule is being configured if a new rule is being created.
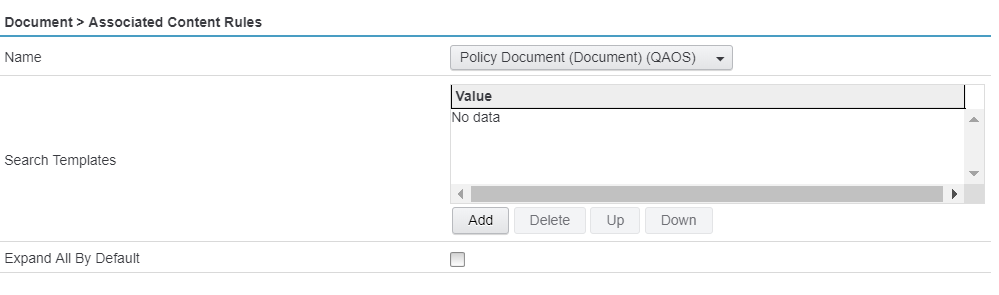
- Search templates that will be used to find associated documents, can be added, removed and reordered in the 'Search Templates' section.
- Optionally check the 'Expand All By Default' if the all associated content should be automatically displayed when a used navigates to the tab. If this isn't checked, results are collapsed in a tree under each search template.
- Finally click the 'Apply Button' to register the changes.
Resources
- IBM FileNet P8 documentation can be located at https://www.ibm.com/support/knowledgecenter/SSNW2F_5.5.0/com.ibm.p8toc.doc/welcome_p8.htm
- IBM Content Navigator Documentation can be located at https://www.ibm.com/support/knowledgecenter/SSEUEX_3.0.5/KC_ditamaps/contentnavigator.htm